Introduction
Building a simple wood shelter is a great way to provide protection from the elements and create a comfortable outdoor space. Whether you are looking to build a shelter for camping, a garden shed, or a playhouse for your children, a simple wood shelter can be a great addition to your outdoor space. In this guide, we will provide step-by-step instructions on how to build a simple wood shelter, from gathering the materials to the finishing touches. With the right tools and materials, you can easily build a sturdy and attractive shelter that will last for years to come.
Step-by-Step Guide to Building a Simple Wood Shelter
Welcome to your guide to building a simple wood shelter! This project is a great way to get started with woodworking and can be completed in a weekend. With just a few basic tools and materials, you can create a shelter that will last for years. So let’s get started!
Step 1: Gather Your Materials
The first step is to gather all the materials you’ll need for your shelter. You’ll need wood for the frame, roofing material, and hardware such as nails and screws. Make sure to measure the area where you plan to build the shelter so you know how much material you’ll need.
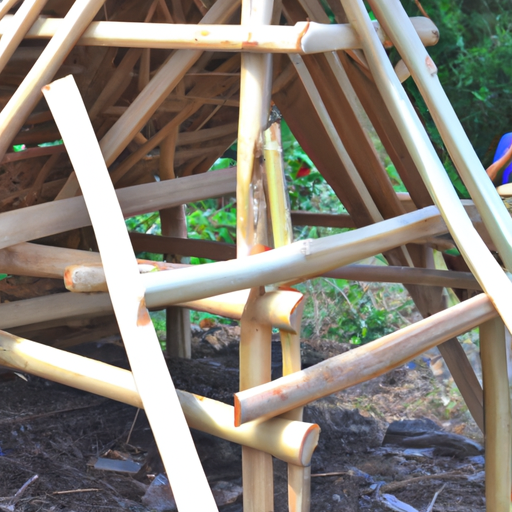
Step 2: Cut the Wood
Once you have all your materials, it’s time to start cutting the wood. Measure and mark the pieces you need for the frame and then use a saw to cut them to size. Make sure to wear safety glasses and gloves when cutting the wood.
Step 3: Assemble the Frame
Now it’s time to assemble the frame. Start by laying out the pieces of wood on the ground and then use nails or screws to attach them together. Make sure to use a level to make sure the frame is even.
Step 4: Add the Roofing Material
Once the frame is assembled, it’s time to add the roofing material. Start by laying out the material on the frame and then use nails or screws to attach it. Make sure to overlap the pieces of material to create a waterproof seal.
Step 5: Finish the Shelter
The last step is to finish the shelter. You can do this by adding trim around the edges of the frame and roofing material. You can also paint or stain the wood to give it a finished look.
And that’s it! You’ve just built a simple wood shelter. Now you can enjoy the shelter for years to come. Congratulations!
What Tools and Materials Do You Need to Build a Simple Wood Shelter?
Building a simple wood shelter is a great way to provide protection from the elements. To get started, you’ll need some basic tools and materials. Here’s a list of what you’ll need:
Tools:
– Hammer
– Nails
– Saw
– Drill
– Level
– Tape measure
Materials:
– Wood boards
– Plywood
– Roofing material
– Screws
– Sealant
– Paint
Once you have all the tools and materials, you’ll be ready to start building your shelter. Good luck!
How to Choose the Right Location for Your Simple Wood Shelter

When it comes to choosing the right location for your simple wood shelter, there are a few things to consider. First, you want to make sure the area is safe and secure. Look for a spot that is away from busy roads and away from any potential hazards.
Next, you want to make sure the area is accessible. You don’t want to have to hike miles to get to your shelter. Look for an area that is close to a road or trail, so you can easily get to and from your shelter.
Finally, you want to make sure the area is suitable for your shelter. Look for a spot that is flat and dry, with plenty of shade. You also want to make sure the area is free of debris and other potential hazards.
Once you’ve found the perfect spot, you can start building your shelter. Make sure to follow all safety guidelines and use the right materials for the job. With a little bit of planning and preparation, you can have a safe and secure shelter in no time.
Tips for Making Your Simple Wood Shelter Weatherproof
1. Start by making sure your shelter is well-built and sturdy. Make sure all the joints are tight and secure, and that the wood is in good condition.
2. Use a waterproof sealant on the wood to protect it from the elements. This will help keep out moisture and prevent rot.
3. Install a roof that is sloped to allow rain and snow to run off. Make sure the roof is securely attached to the shelter and that it is made of a material that won’t easily be damaged by the weather.
4. Install flashing around the edges of the roof to help keep out moisture.
5. Install gutters and downspouts to help direct water away from the shelter.
6. Install weather stripping around the doors and windows to help keep out drafts.
7. Make sure the shelter is well-ventilated to help reduce condensation.
8. Install a chimney cap to help keep out rain and snow.
9. Make sure the shelter is well-insulated to help keep it warm in the winter and cool in the summer.
10. Finally, make sure the shelter is regularly maintained and inspected for any signs of damage or wear.
How to Add Finishing Touches to Your Simple Wood Shelter for a Professional Look
If you’ve built a simple wood shelter, you may be wondering how to give it a professional look. Here are some tips to help you add the finishing touches to your shelter.
First, consider painting or staining the wood. This will give your shelter a polished look and protect it from the elements. You can also add trim around the edges of the shelter to give it a more finished appearance.
Next, think about adding some decorative elements. You could hang a wreath on the door, or add some outdoor lighting to the exterior. You could also add some plants or flowers around the shelter to give it a more inviting feel.
Finally, consider adding some furniture to the shelter. A few chairs or a bench will make it more comfortable and inviting. You could also add a table or a fire pit to make it a great place to hang out.
These are just a few ideas to help you give your simple wood shelter a professional look. With a little bit of effort, you can transform your shelter into a beautiful and inviting space.
Conclusion
Building a simple wood shelter is a great way to provide shelter for yourself or your family in an emergency situation. It is also a great way to save money and be creative with your outdoor space. With the right materials and tools, you can easily build a simple wood shelter that will provide protection from the elements and keep you safe. With a little bit of planning and effort, you can create a shelter that will last for years to come.